Email remains an important communication channel. By connecting your email to your account, you can manage all your emails in a single window and immediately create orders or pipeline cards.
Preparing to email connection
Before connecting, make sure that POP and IMAP are enabled in your email settings. Please refer to the instructions, which describe the parameters and settings:
Connecting email within keyCRM
In your dashboard, go to «Settings» → «Communications» → the «Chats / SMS / Email» tab and click the «Add new channel» button.
In the window that opens, on the «General» tab, fill in the following information:
-
Title — enter a name for the channel;
-
Channel — select the «Email» channel type;
-
IMAP host — each email service has its own IMAP host address. You can find this information in your email service's settings or instructions;
-
IMAP port — the default is 993, which works for most email services. You can find the port number in your email service’s settings or instructions;
-
SMTP host — each email service has its own SMTP host address. You can find this information in your email service’s settings or instructions;
-
SMTP port — the default is 465, which works for most email services. You can find the port number in your email service’s settings or instructions;
-
Username — enter the name of the email account you’re connecting;
-
Password — enter the password for the email account you are connecting or the app password (for some email services);
-
Encryption — select an option from the list;
-
Sender name — enter the name from which your clients will receive emails;
-
Save delivered emails — toggle the switch if you want to save emails in your inbox;
-
Mark emails as read — toggle the switch if you want received emails to be marked as read in your inbox;
-
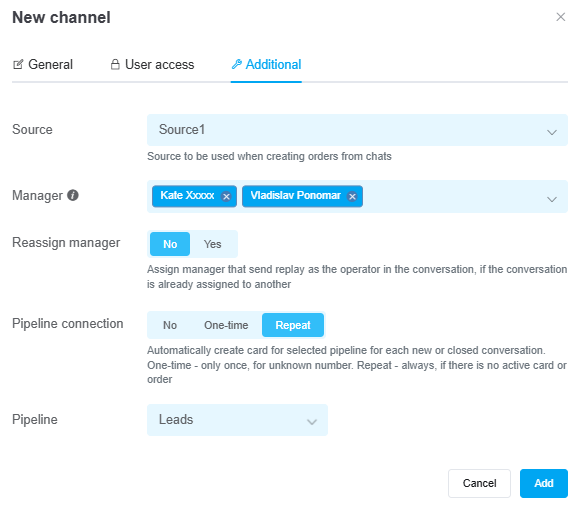
Source — if necessary, select the source that will be used by default for orders created from this channel;
-
Manager — if necessary, specify the manager to whom all new chats from this channel will be assigned immediately. If you add multiple managers, messages will be assigned to each manager in turn. You can leave this field blank;
-
Reassign manager — if needed, toggle the switch to automatically assign the manager who responds to the message;
-
Pipeline connection — enable and select a value:
• No — cards will NOT be created automatically from chats;
• One-time — cards will be created only once, provided there is no existing card from this chat;
• Repeat — cards will always be created when a new ticket is opened in the chat, if there is no card or order in active statuses (all statuses except successful and rejected); -
Pipeline — select a funnel if you need to automatically create cards from new messages. This option is available if you have the «Pipelines» section enabled.

Once you've entered all the necessary settings, click the «Add» button. The channel will appear in the list of connected channels. Messages will start arriving once every 15 minutes and will be displayed in the «Convos» section.
You can now send emails manually or set up automatic sending using pre-made message templates.
If needed, you can also configure user access to the channel.