Інвентаризація на складі — це процес систематичного обліку та перевірки наявності товарів на складі з метою точного визначення їх кількості та стану. Вона дозволяє підприємствам встановити фактичний залишок товарів, порівняти його з даними обліку та виявити можливі відмінності.
Як провести інвентаризацію
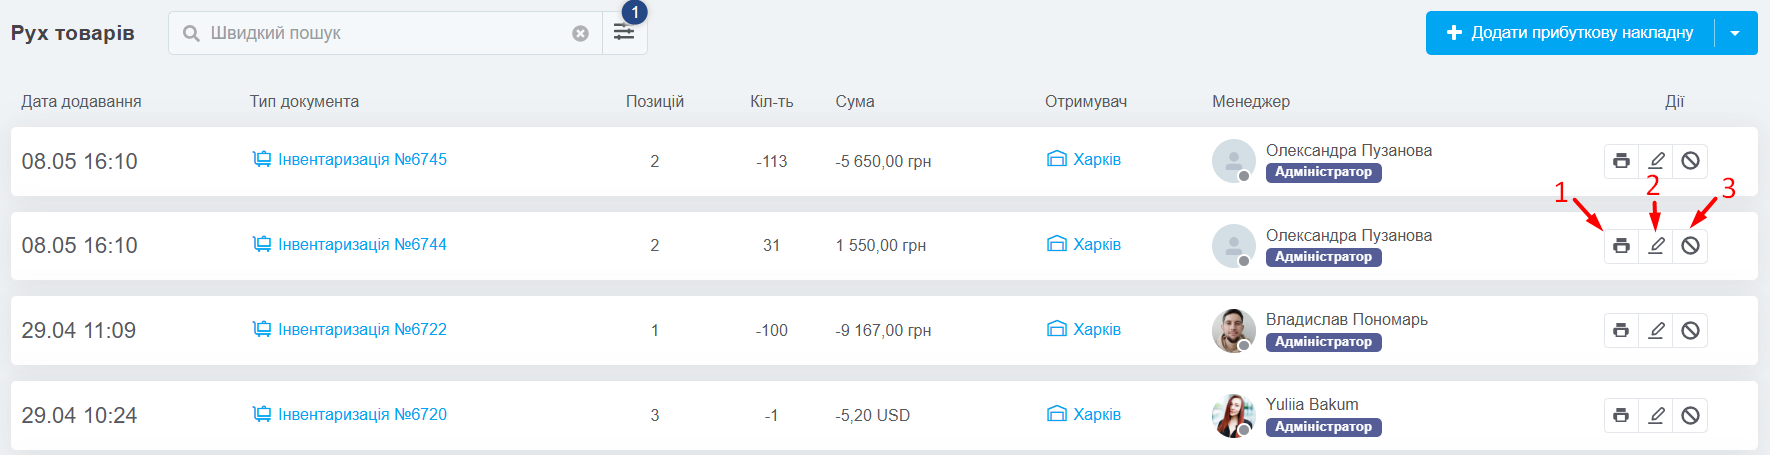
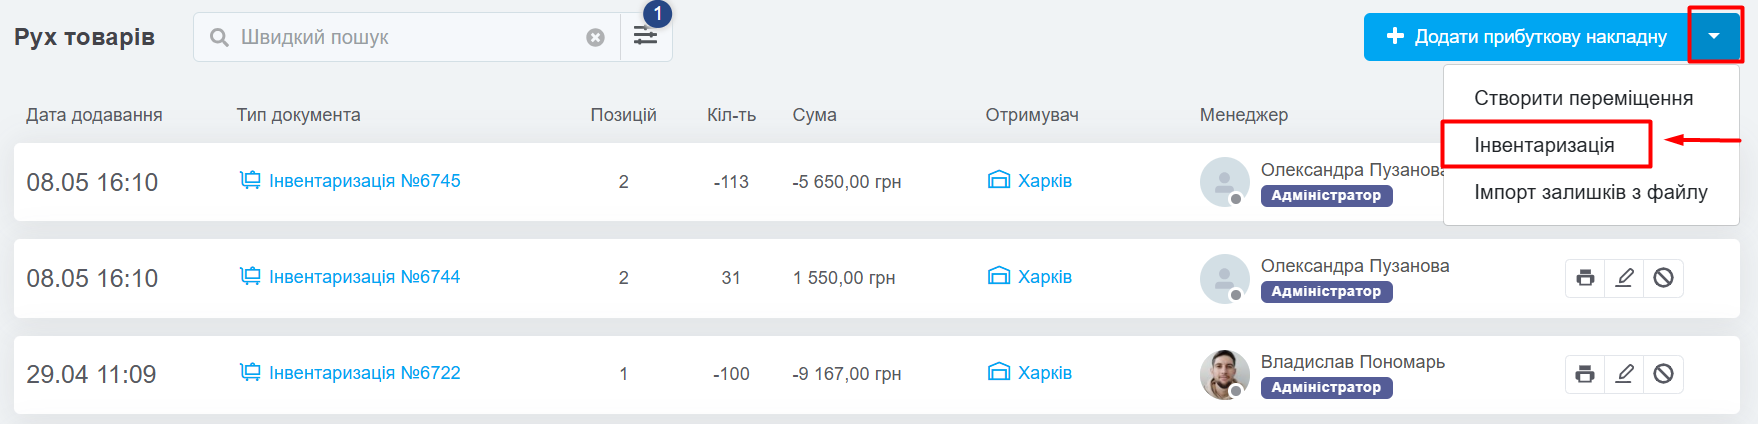
Перейдіть до «Каталог» → «Рух товарів», де виводиться список усіх операцій із товарами. У верхньому правому кутку натисніть на трикутник біля кнопки і оберіть «Інвентаризація»:
На сторінці, що відкрилась, 3 основних блоки:
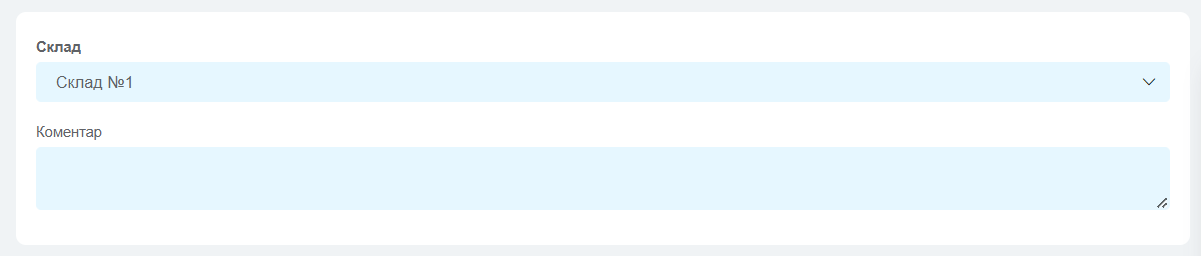
1. Склад
- Склад — виберіть склад на якому проводите інвентаризацію. Якщо у вас в системі лише один склад, то цього поля не буде;
- Коментар — залиште коментар до цього документу інвентаризації за потреби.
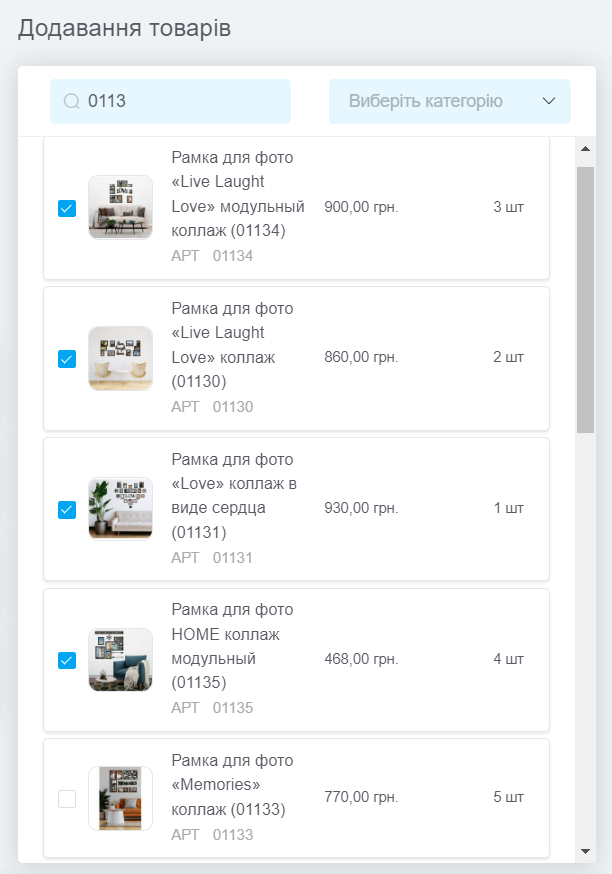
2. Додавання товарів
Для додавання товарів доступне використання сканера. З його допомогою можна швидко знаходити товари за артикулом чи штрихкодом. Для цього просто поставте курсор у поле пошуку та використовуйте сканер. Товар буде відразу додано в документ.
Щоб додавати товари з каталогу вручну, використовуйте два поля для пошуку потрібних:
- По назві або артикулу — пошук не вимагає точного запиту чи повної назви, наприклад, можна ввести частину назви або розмір чи колір;
- По категоріях — зручно, коли потрібно додати товари з певної категорії.
Для зручності роботи окрім назви товару відображається його артикул, властивості, ціна закупівлі у валюті товару, а також доступний залишок і в дужках кількість товару у резерві.
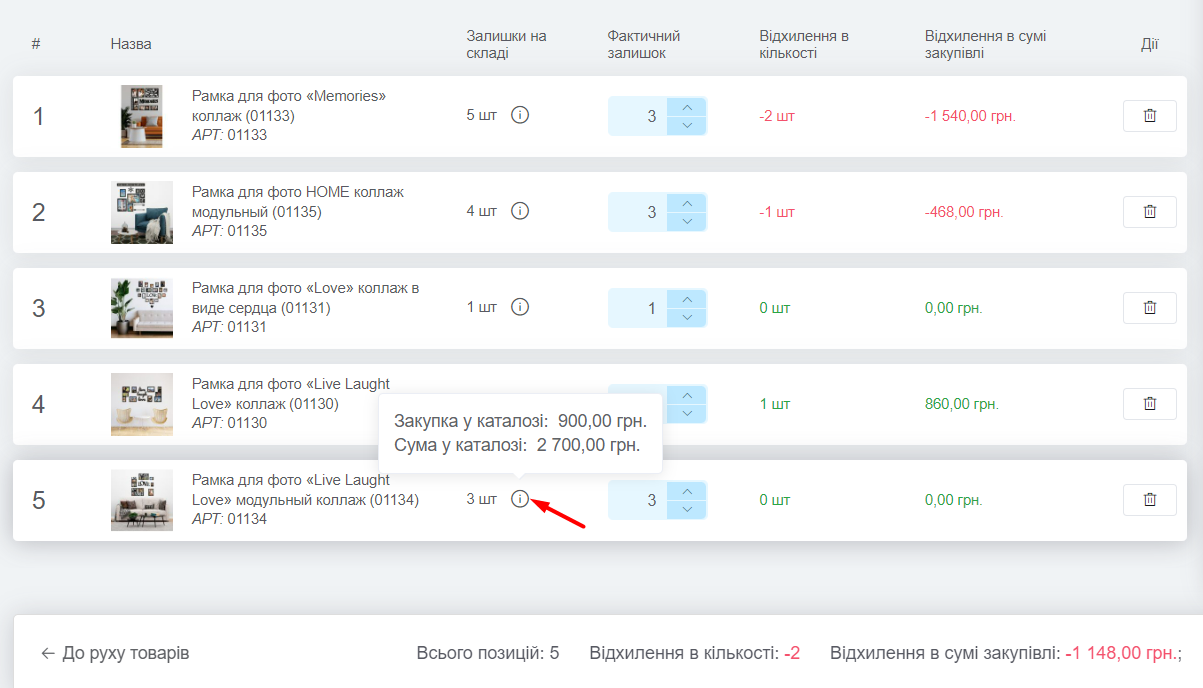
3. Таблиця зі списком товарів
Тут виводяться всі товари, які ви додали до інвентаризації. Таблиця складається з наступних колонок:
- # - номер товару в цьому документі;
- Назва — інформація про товар (назва, зображення, властивості, артикул, штрих-код);
- Залишки на складі — залишок цього товару в системі на вибраному складі. По наведенню на іконку «i» відображається ціна та сума закупівлі цього товару в каталозі;
- Фактичний залишок — реальний залишок цього товару на складі;
- Відхилення в кількості — різниця між фактичним залишком та залишком у системі;
- Відхилення в сумі закупівлі — різниця між фактичною сумою у закупівлі та у системі;
- Дії — натиснувши кнопку в цій колонці можна видалити товар з інвентаризації.
Після додавання товарів, на панелі знизу, з'явиться інформація про загальну кількість, відхилення в кількості та відхилення в сумі закупівлі:
Щоб провести операцію, натисніть кнопку «Зберегти». Запис про неї з'явиться у розділі «Рух товарів», залишки по позиціях оновляться до фактичних, а в історії змін залишків по кожному товару буде додано деталі внесених змін.
Дії з інвентаризацією
- Роздрукувати;
- Відредагувати — якщо в момент інвентаризації припустилися помилки;
- Скасувати.