Integration with OneVOIPlanet can be set up in just a few steps and will allow you to:
-
make calls from the CRM and handle incoming calls;
-
create customers, orders, or requests directly from the call card;
-
view the entire call history, including call recordings.
Step 1. Retrieve your connection details from your OneVOIPlanet account
In the OneVOIPlanet dashboard, go to the «Integrations» section → «keyCRM» and toggle the «Activate» switch.
In the window that opens, you will see the «Webhook» field, which you will need in the next configuration step. Therefore, leave this window open and proceed to the next step.
Step 2. Create a call channel in keyCRM
Go to «Settings» → «Communications» → the «Calls» tab and click the «Add new integration» button.
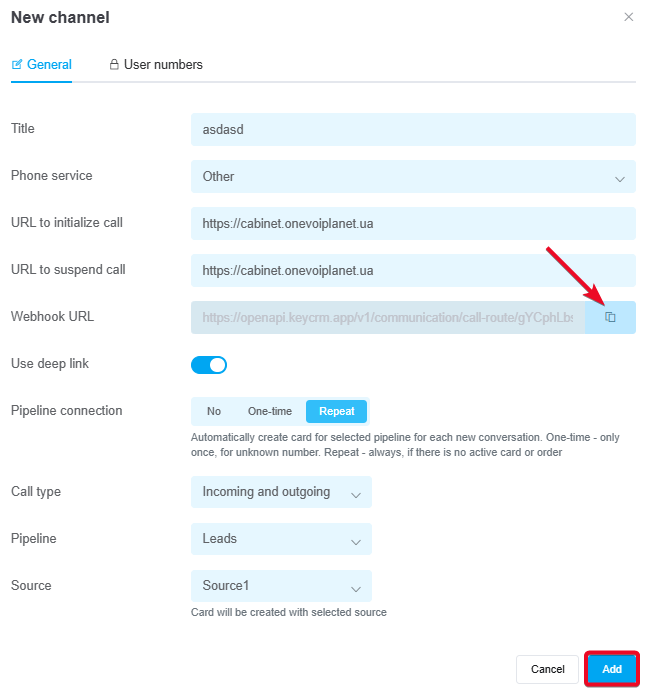
In the window that appears, on the «General» tab:
-
Title — enter the name of the telephony service;
-
Phone service — select «Other».
-
URL to initialize call — enter the link to the telephony dashboard
https://cabinet.onevoiplanet.ua; -
URL to suspend call — enter the link to the telephony dashboard
https://cabinet.onevoiplanet.ua; -
Webhook URL — copy the link for further configuration on the telephony side;
-
Use deep link — enable this if you are using a softphone that supports this technology;
-
Connection to pipelines — enable this and select a value:
• No — cards will NOT be created automatically from calls;
• One-time — cards will be created only once, provided there is no existing card for this number;
• Repeat— cards will always be created for repeat calls, provided there is no card for the number in active statuses (all statuses except successful and rejected). -
Call type — select the call type from which cards will be created: only incoming, only outgoing, or all — incoming and outgoing;
-
Pipeline — specify the pipeline for creating cards. If you have only one pipeline, it is selected automatically, and the selection field will not appear;
-
Source — select the source from which the card will be created. If you do not select one, the card will be created with an empty value in the source field.
How the deep link feature works
Deep link – a feature that immediately initiates a call in the device's default app.
How it works:
-
If your device has a default softphone app for calls, and it is active with the deep link feature enabled in the phone settings, tapping «Call» in the CRM will immediately open this app to place a call to the customer.
-
You should enable deep linking only if you use a softphone that supports this technology (for example, MicroSIP or the paid version of Zoiper). If you’re unsure, you can test it. Enable it first; if outbound calls from the CRM don’t work, then disable it.
-
If you disable deep linking, the call will be made through the telephony system itself. First, the CRM sends a request to the telephony system to initiate the call; upon receiving it, the telephony system places the call to the manager’s softphone or IP phone, the manager picks up the phone, and the connection with the client begins.
-
IP phones do not support the deep link feature, so when working with them, it must be disabled.
Step 3. Connecting the numbers
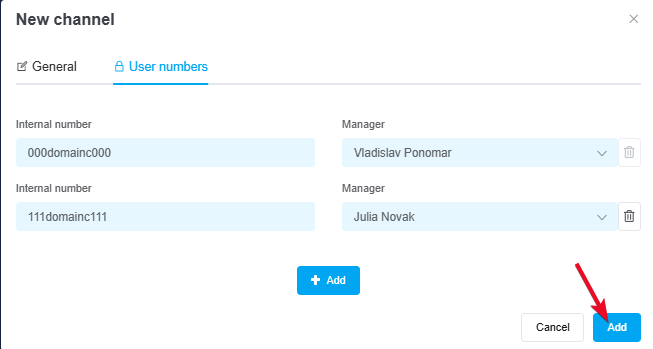
In the settings window, go to the «User numbers» tab and fill in the details:
-
Internal number — the OneVOIPlanet internal line number;
-
Manager — the user in the CRM who corresponds to this number.
The dropdown list will include users who have been granted access to telephony.
You can find your SIP account numbers in your OneVOIPlanet account under the «Employees» section.
Take the SIP account number of the employee (manager) and add your domain name. The result is 001domainc001.
After entering the information, be sure to click «Add» and proceed to the next step.
Step 4. Finish the setup
-
After adding phone functionality to the CRM, refresh the page.
-
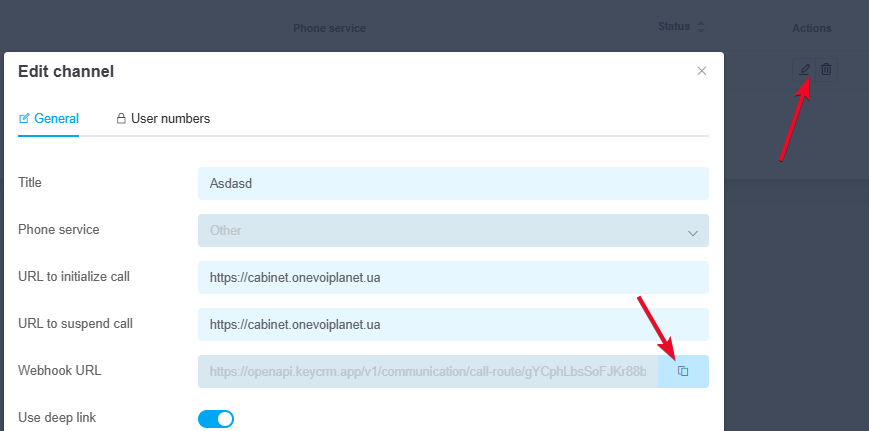
Click the «Edit Integration» button and copy the Webhook link:
-
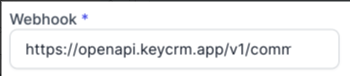
Paste the Webhook link into the corresponding field in your OneVOIPlanet account:
Click «Save» to finish the setup.
