Connecting WhatsApp Business to keyCRM allows you to be the first to send messages and communicate with customers in the chat section of the CRM on behalf of your company. You can send messages about orders, requests, and other events in the chat section or automatically via triggers.
Step 1. You will need:
-
Twilio paid account: If you don’t have one, you can sign up for a new account, upgrade to the paid version, and complete identity verification. Use of the integration is billed separately by Twilio based on the number of messages sent;
-
Meta Business Portfolio (official Facebook Business Page): if you don’t have a business account yet, you can create one by following the instructions below;
-
Phone number that isn’t linked to a personal or business WhatsApp account:
-
If the number is already connected to another company’s WhatsApp Business API (not Twilio) or registered in the WhatsApp Business app, you can transfer it;
-
If you have a personal WhatsApp account on that number, you can convert it to a business account. However, you will no longer be able to use the mobile app or access the chat history stored there. Therefore, we recommend connecting a separate number.
Step 2. Creating a WhatsApp sender
After switching to a paid Twilio plan, you must register a WhatsApp sender — this will allow you to send and receive messages on behalf of your brand.
To create a WhatsApp sender:
-
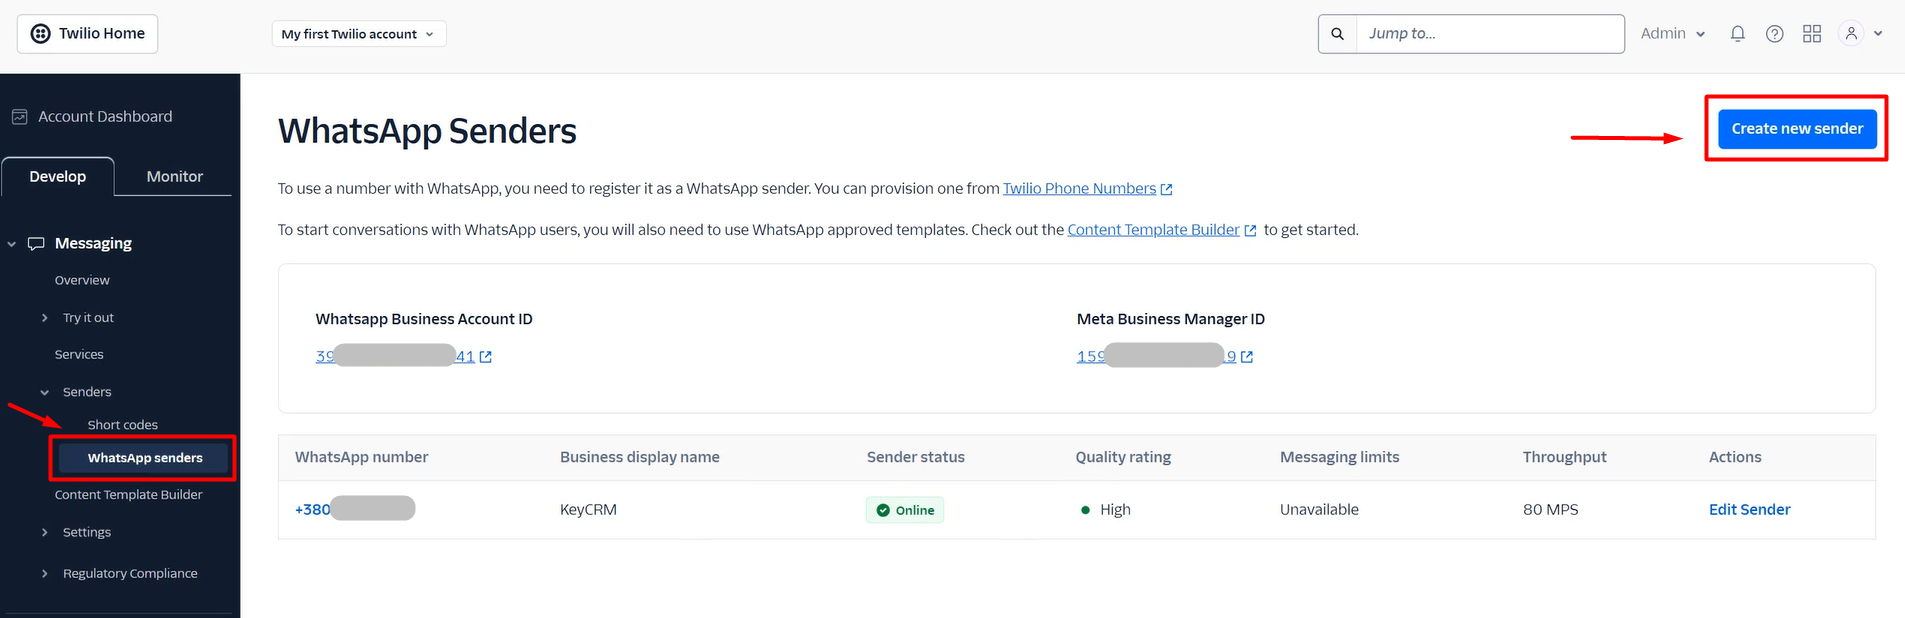
Log in to the Twilio Console, go to «Messaging > Senders > WhatsApp senders», and click «Create new sender».
-
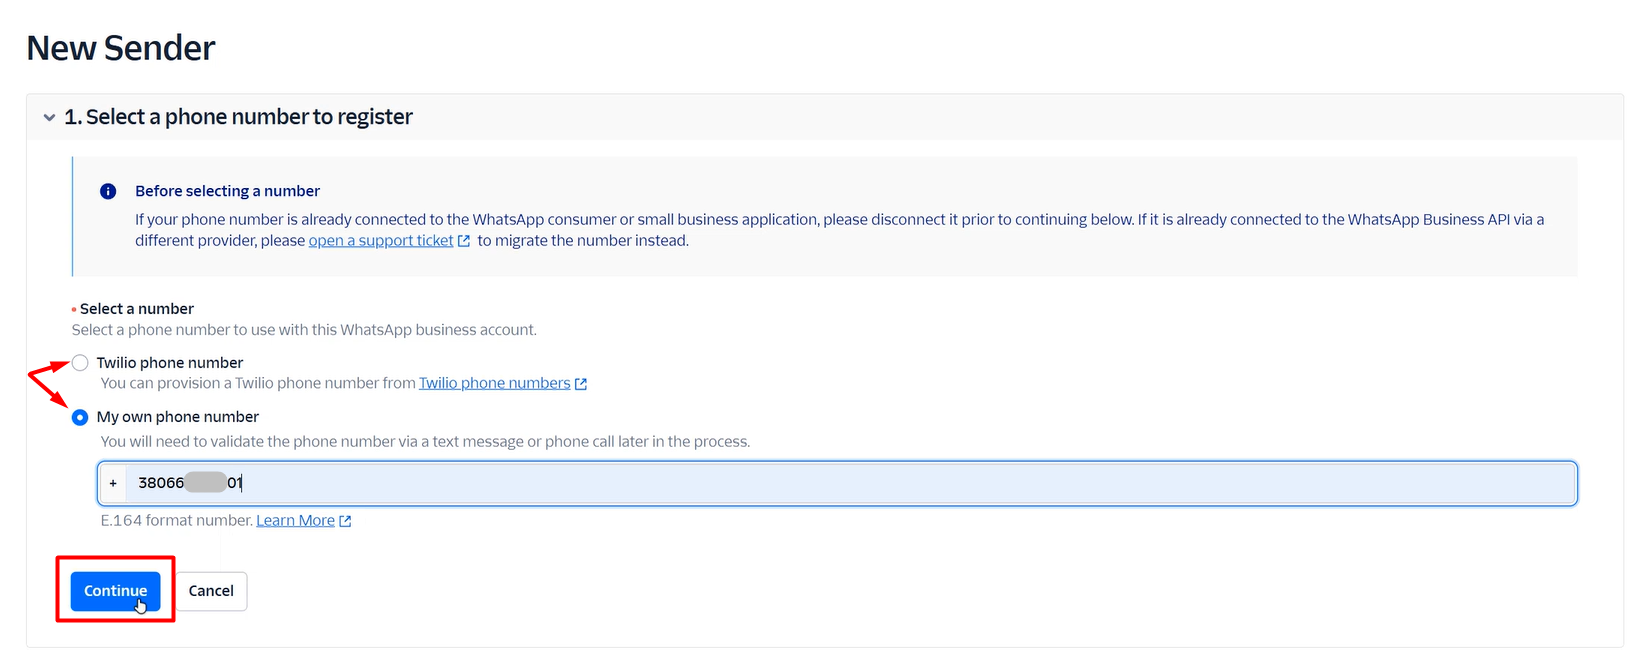
Select a phone number to connect to the WhatsApp Business API: a number from Twilio or enter a number from your mobile carrier. Click «Continue» to proceed.
-
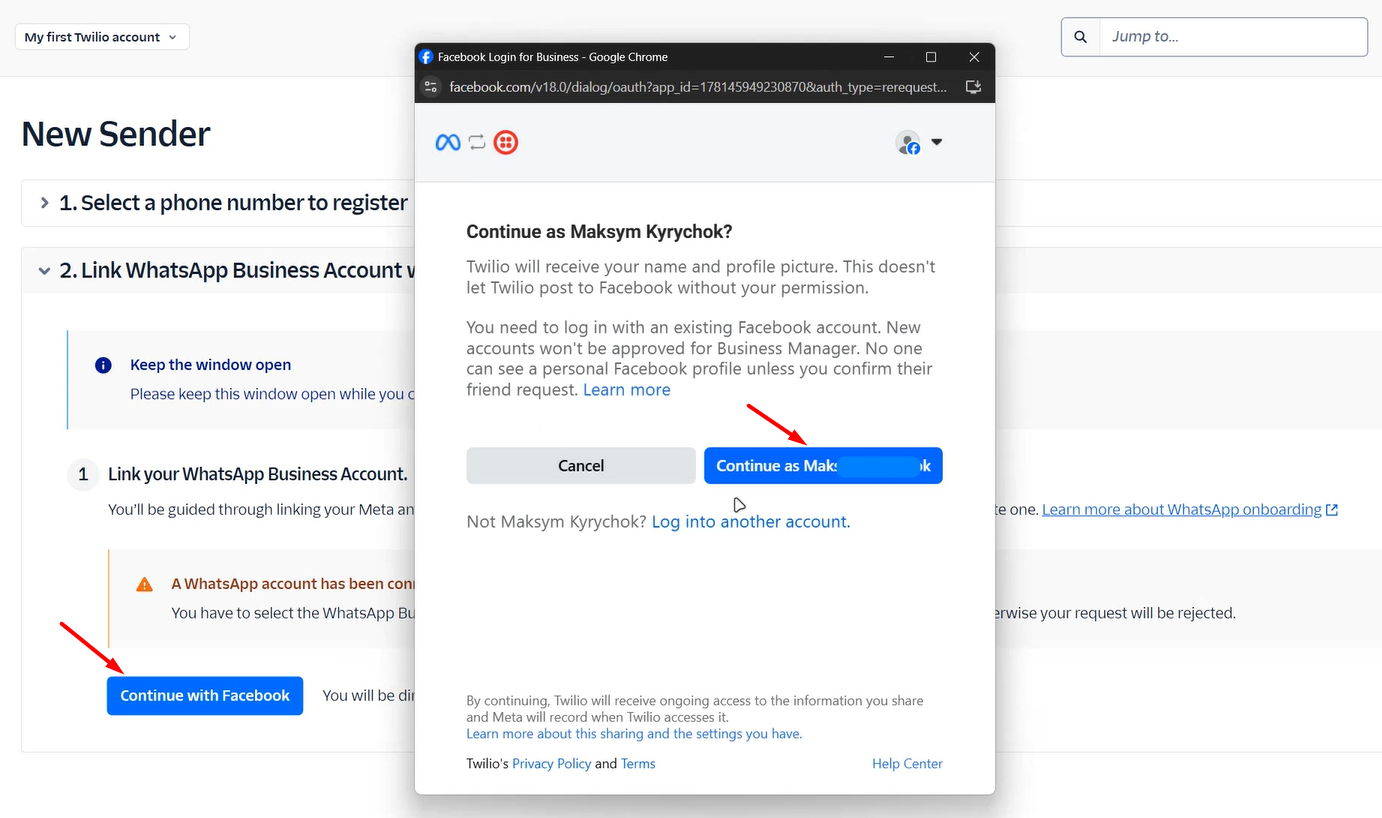
Link your WhatsApp Business Account to your Twilio account by clicking «Continue with Facebook».
- Log in to Facebook if you haven't already, or click «Continue as [your name]» if you're already logged in.
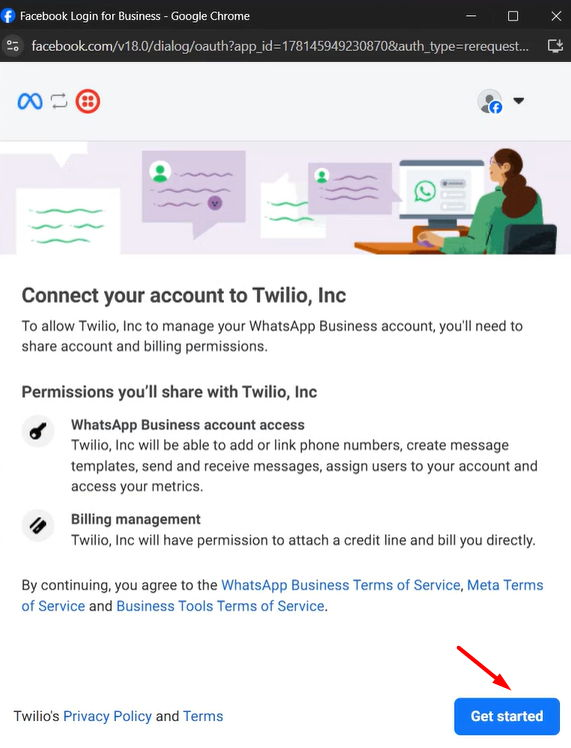
- On the screen describing how to link your phone number to WhatsApp, tap «Get started»:
- Next, select your company’s Meta Business Account from the list, or create a new one by selecting the «Create a Business Account» option. If you don’t have any company accounts, fields for creating a new one will appear immediately:
- In the next step, if this is the first WhatsApp sender in this Twilio account, select «Create a new WhatsApp Business Account».
If you’re adding a sender to an existing account, select the WABA previously created in Twilio. For a new sender, select «Create a new WhatsApp Business profile».
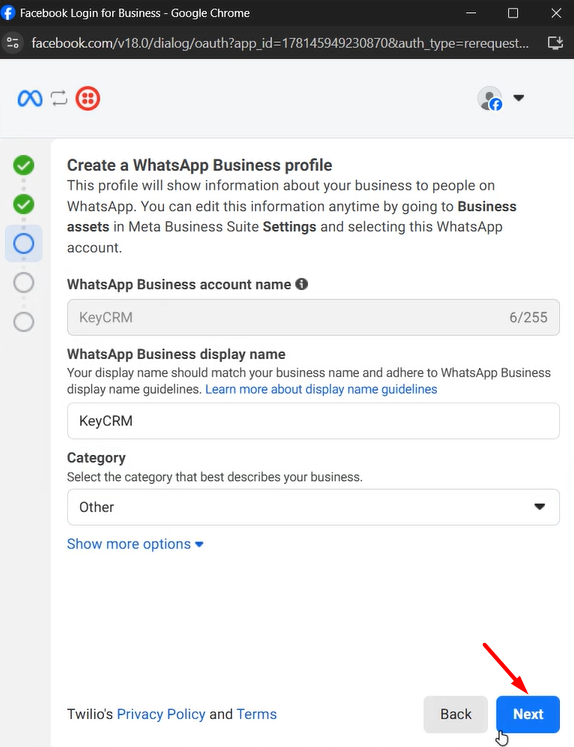
Important! Do not select WABA accounts that were not created in Twilio. If you already have a verified WhatsApp business number that you use with another service, please transfer it. - Next, fill in the fields:
-
WhatsApp Business Account Name - used only for internal purposes and not visible to users. If you selected WABA on the previous screen, you won't be able to change the name here;
-
WhatsApp Business Profile Display Name - this is what your customers will see. It must comply with WhatsApp's requirements;
The following three fields appear when viewing your profile in the WhatsApp app:
-
Category - select the category that best describes your business;
-
Business Description - a brief description of your company;
-
Website - a link to your website. After registering as a WhatsApp sender, you’ll be able to add another website.
Verifying a WhatsApp Business account
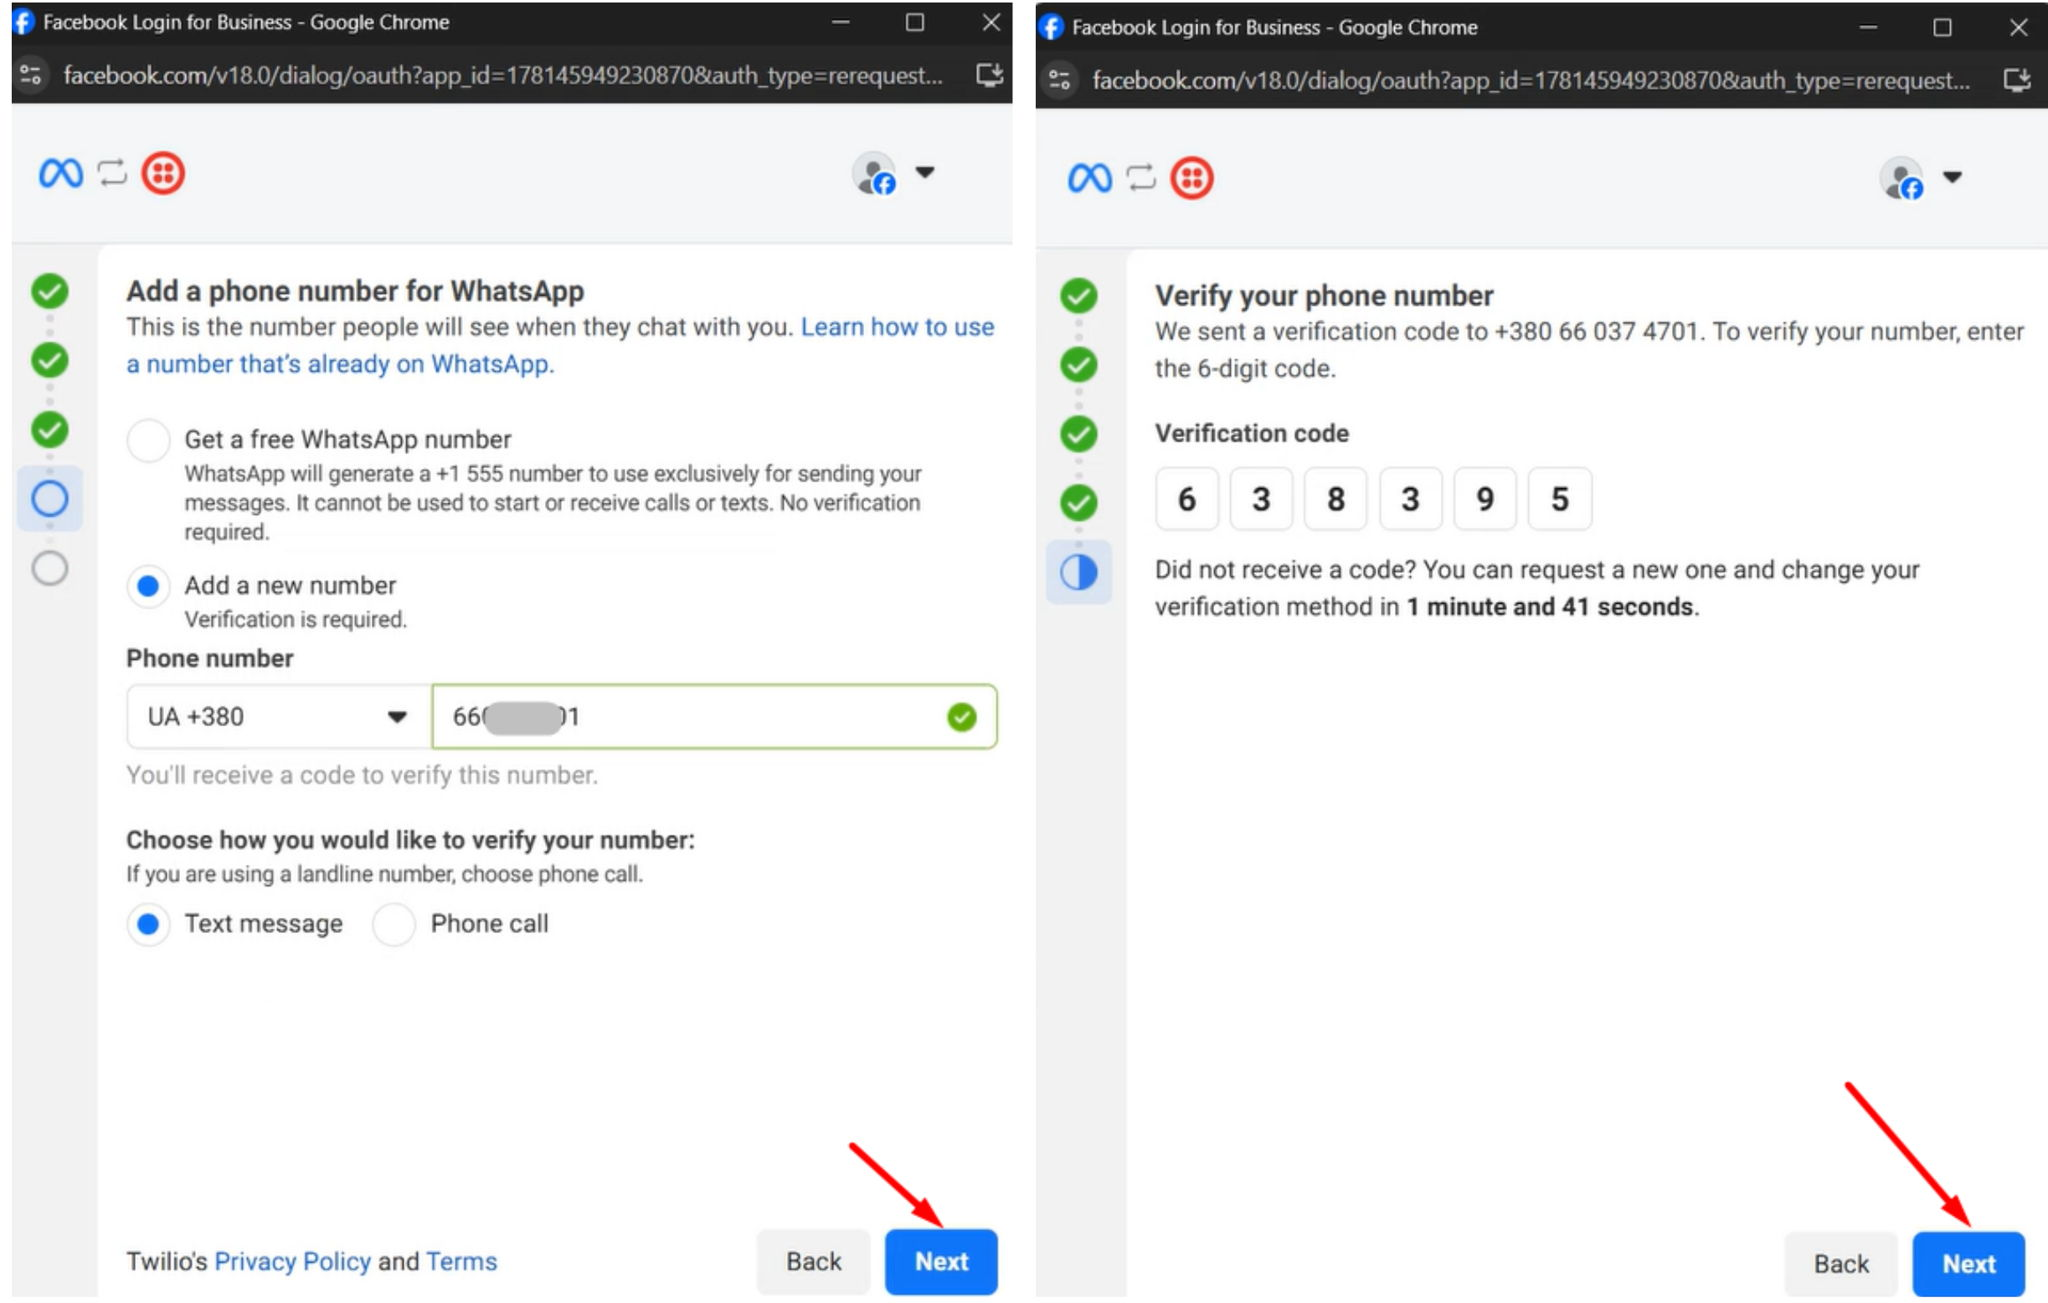
Meta requires verification of ownership of the phone number as part of the registration process. To do this, in the next window:
-
Click «Add a new number»;
-
From the list, select the country and enter the phone number;
-
Select «Text message» to receive an SMS with a verification code (it may be sent via Viber if you have it on this number);
-
Click «Next» and enter the code you received, then click «Next» again:
Once Meta verifies your phone number, you can keep clicking the «Continue» button until the window closes. The new sender will then appear on the page: «Messaging > Senders > WhatsApp senders».
If you haven't yet completed Meta business verification, your access to WhatsApp will initially be limited. If you've already completed business verification, you'll have full access to WhatsApp.
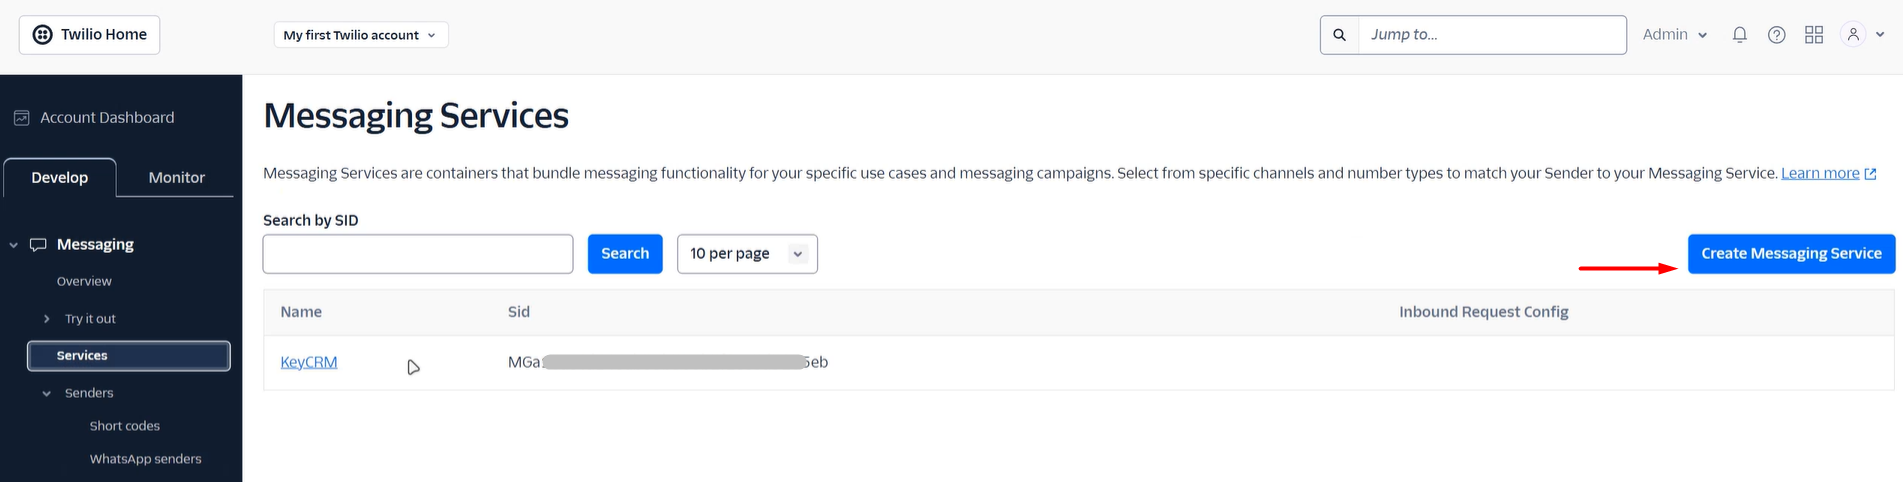
Step 3. Creating a sending service
Go to the «Messaging > Services» section and click «Create Messaging Service»:
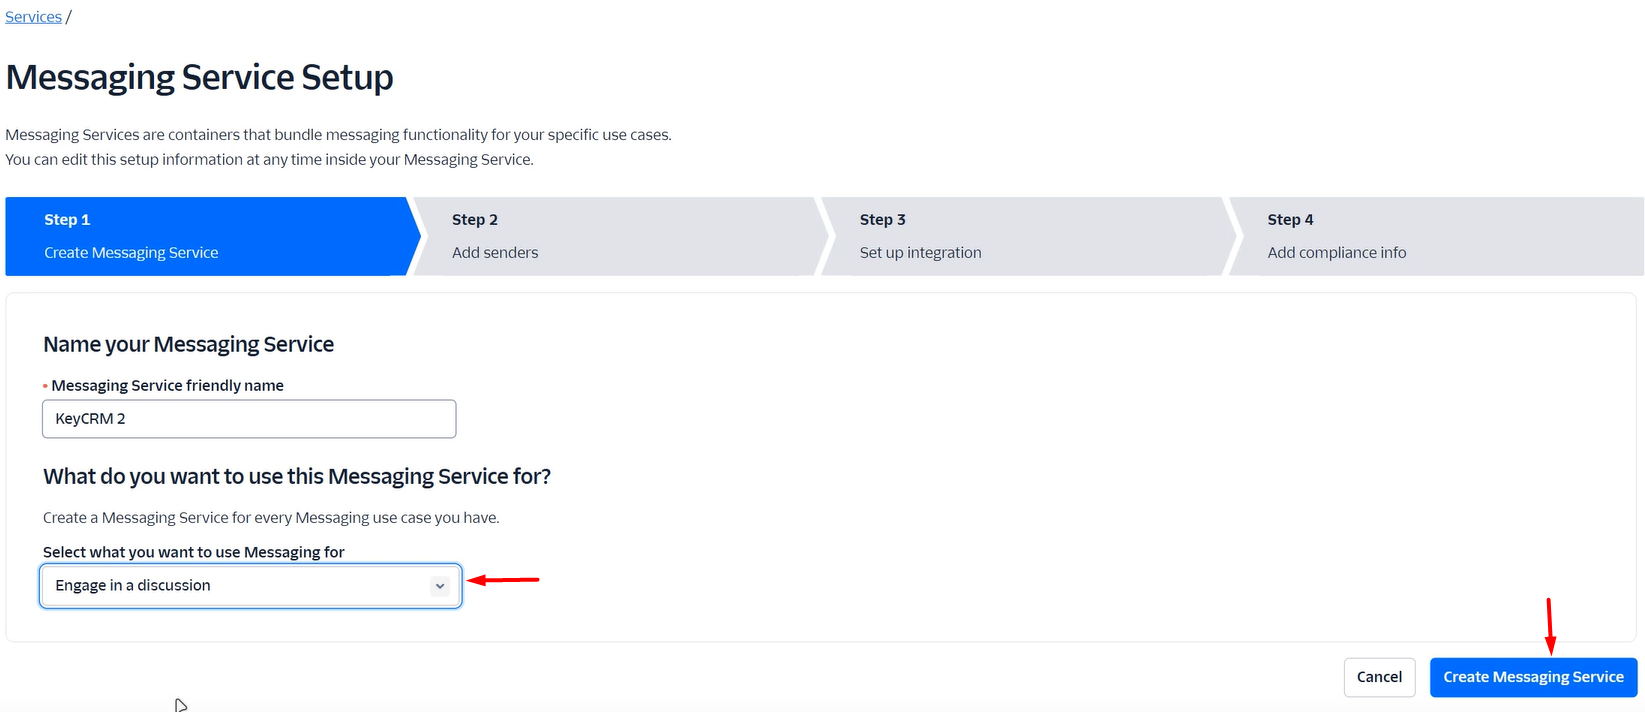
Fill in the fields:
-
Messaging Service friendly name – come up with a name for your messaging service;
-
Select what you want to use Messaging for – select the messaging function «Engage in a discussion».
Click «Create Messaging Service»:
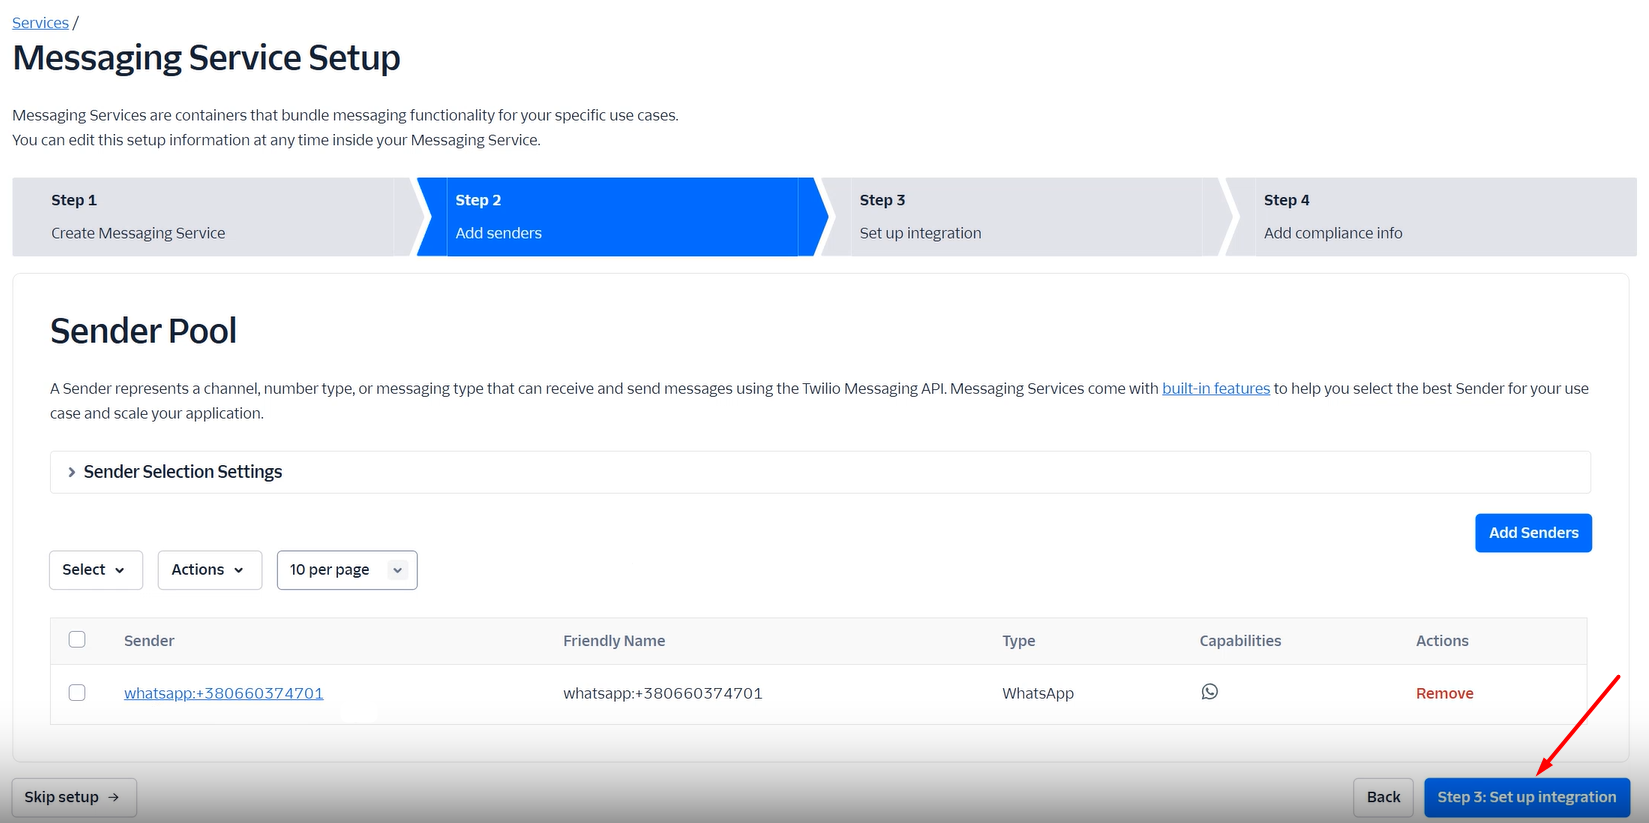
Next, click «Add senders», select «WhatsApp Number», and click «Continue»:

You will then see the number you registered in the previous step; select it. To proceed to the next settings, click «Step 3. Set up integration»:
Next step:
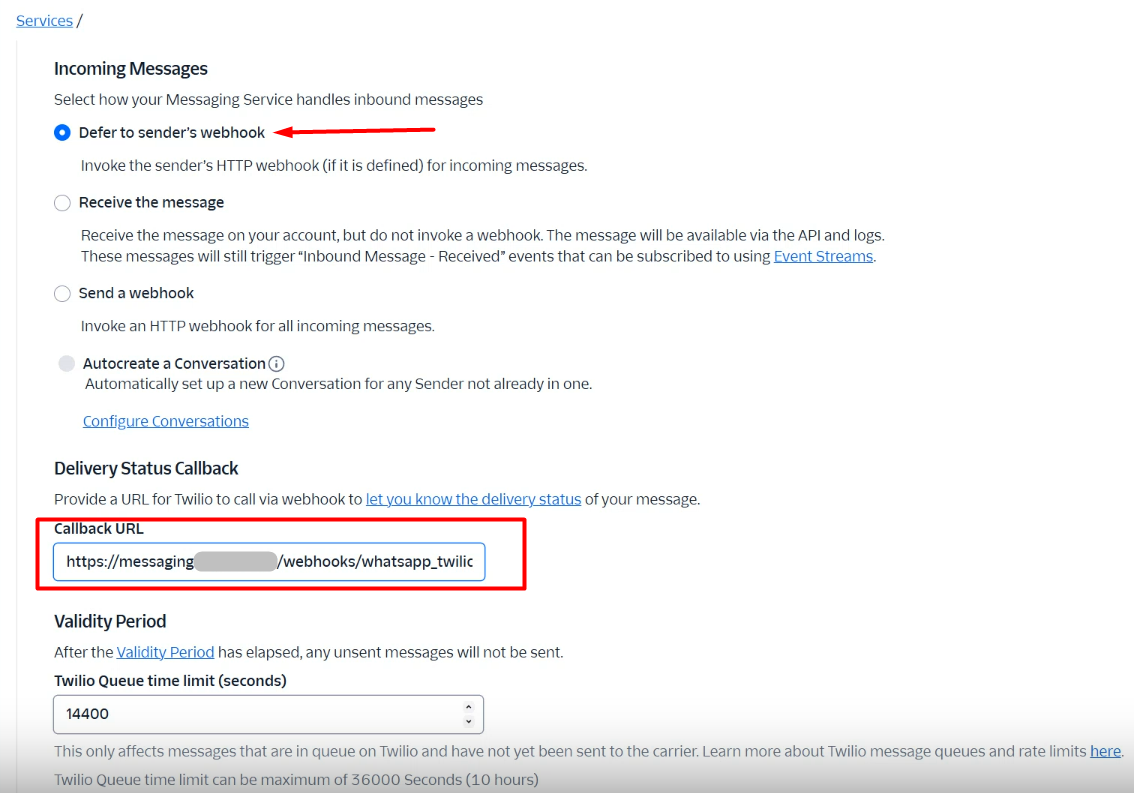
Check the box next to «Defer to sender's webhook»;
In the «Callback URL» field, enter the link https://messaging.keyCRM.app/webhooks/whatsapp_twilio:
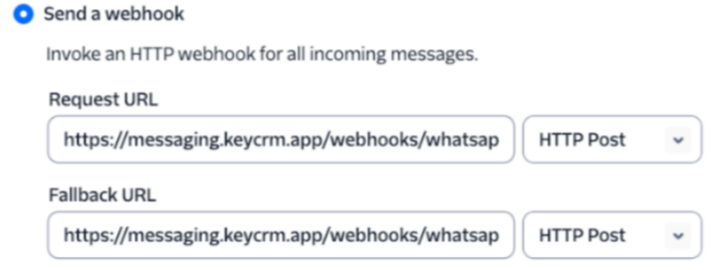
Check the box next to the «Send a webhook» option;
In the fields, enter the link https://messaging.keyCRM.app/webhooks/whatsapp_twilio and select HTTP POST:
Click «Step 4: Add compliance info» and «Complete Messaging Service Setup» to save your settings.
You have successfully created and configured your WhatsApp sender; you can now proceed to connect it to keyCRM.