Weblium is a modern online website builder that allows you to create professional and aesthetic websites without the need for programming or design skills.
In this article, we will look at how to set up the transfer of leads from Weblium contact forms to keyCRM to ensure fast and efficient processing of requests and increase the number of satisfied customers.
Step 1. Setting up in keyCRM
Data required from keyCRM for integration:
-
Obtain an API key. Go to «Settings» → «General». In the «API key» line, click «Generate API key» or copy it if it has already been created.
-
If you do not have any pipelines created in the system or need to create a separate pipeline to receive requests from the Weblium website, follow the instructions: How to set up pipelines and statuses.
Step 2. Connection on the Weblium side
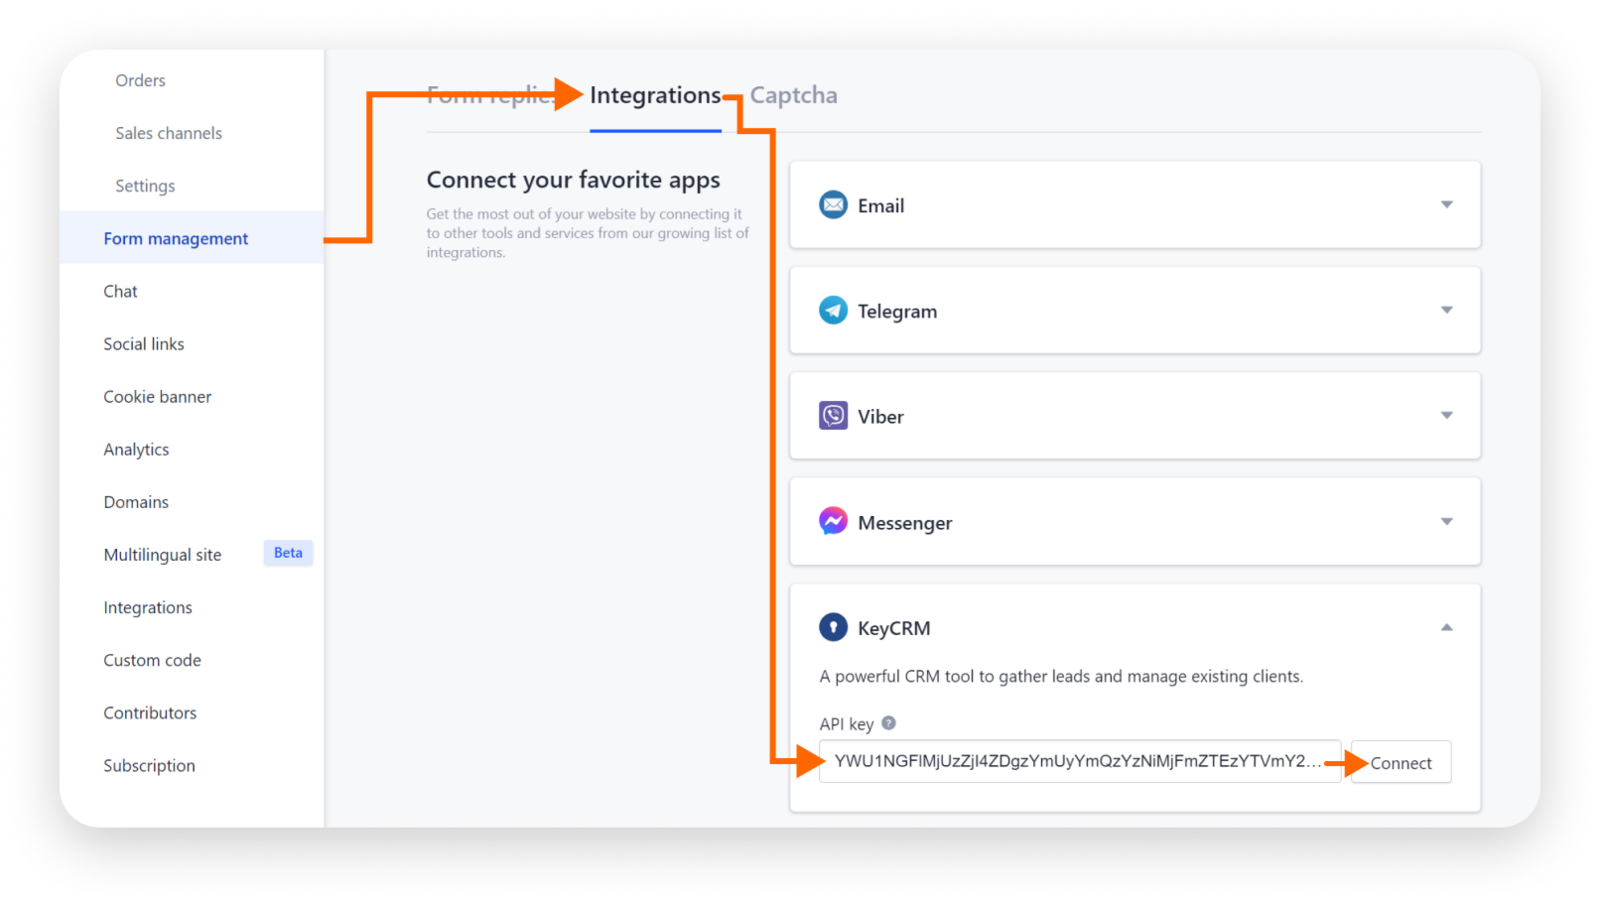
Go to your website settings on Weblium, open the «Form management» section, and go to the «Integrations» tab.
Find and expand the «keyCRM» section, paste the previously copied API key into the field, and click the «Connect» button:
Step 3. Configuring fields in Weblium forms
To transfer data from Weblium to keyCRM, you need to specify which fields of the contact form on your Weblium website correspond to the fields in keyCRM.
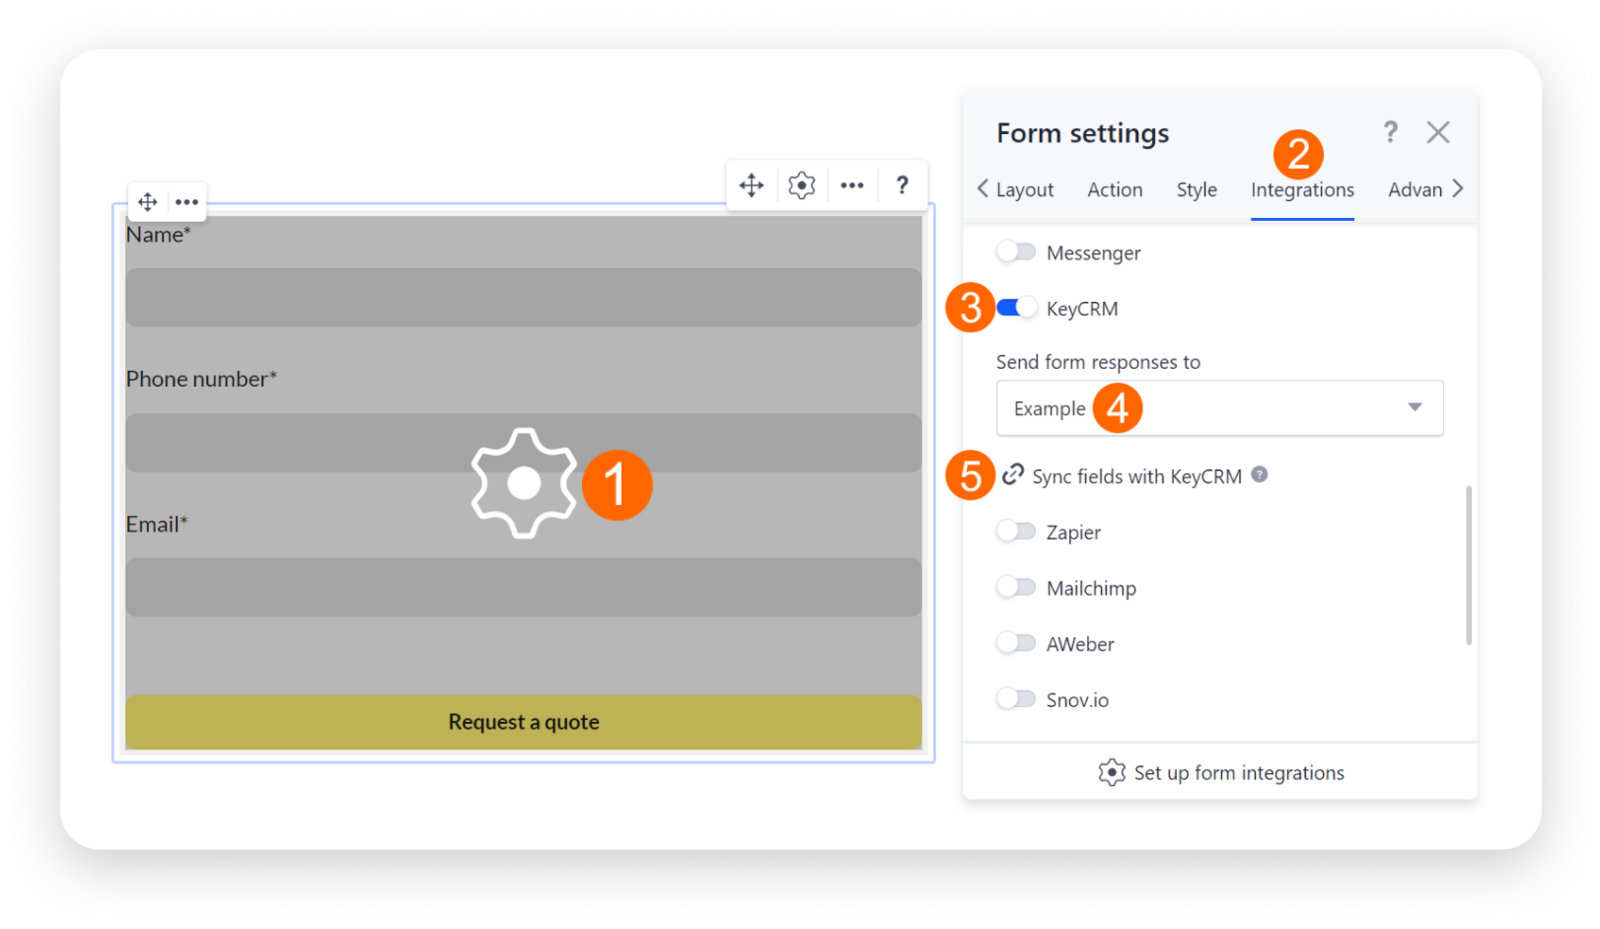
First, you need to activate the integration with keyCRM in the form settings:
-
Go to the website editor on Weblium and open the required form.
-
Next, go to the «Integrations» tab and activate the switch next to keyCRM.
-
Select the pipeline to which you want to send applications from Weblium and click the «Sync fields with keyCRM» button.
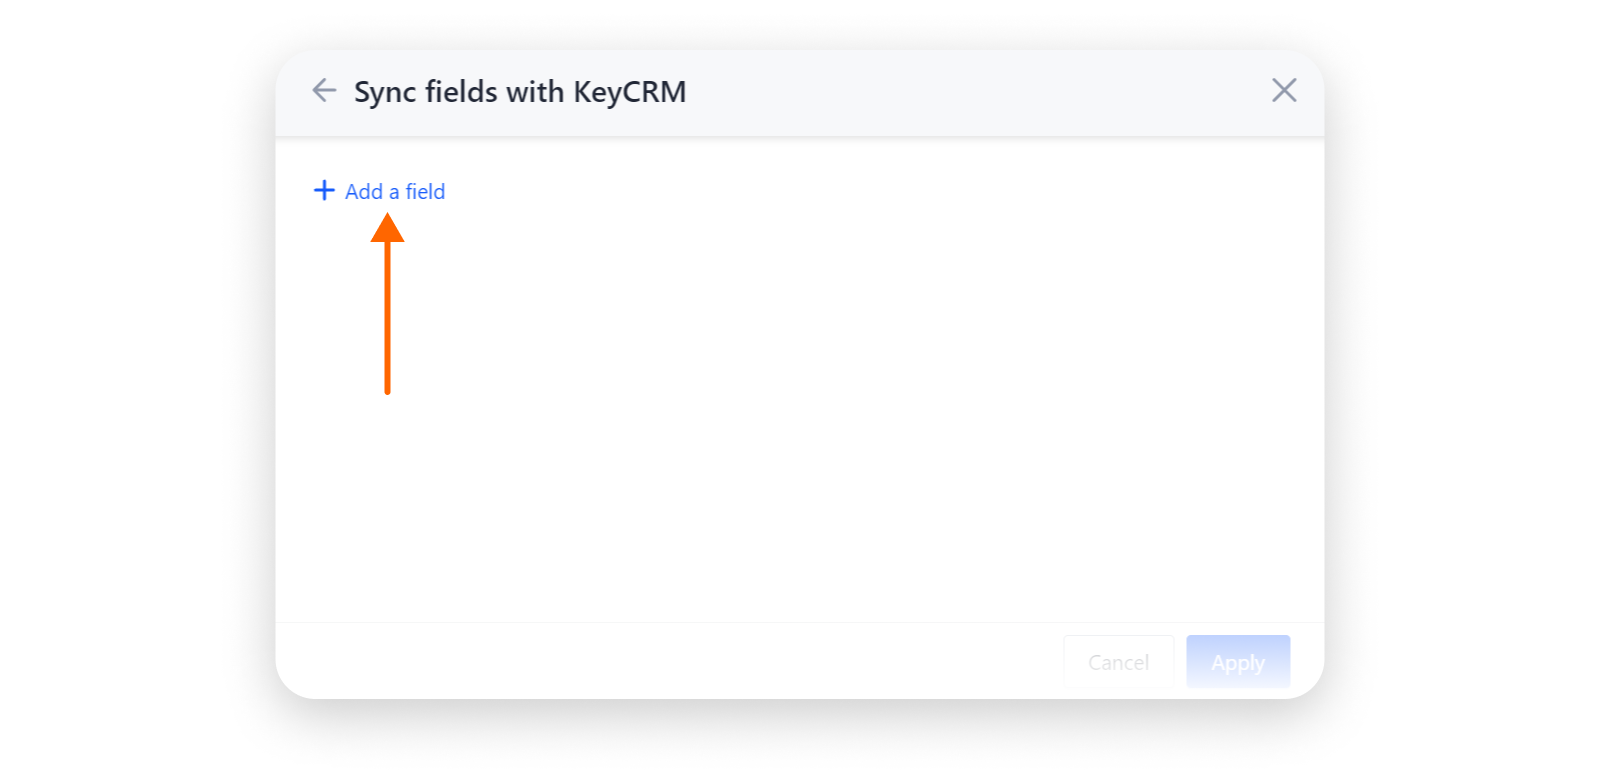
In the window that opens, click on the «Add a field» button:
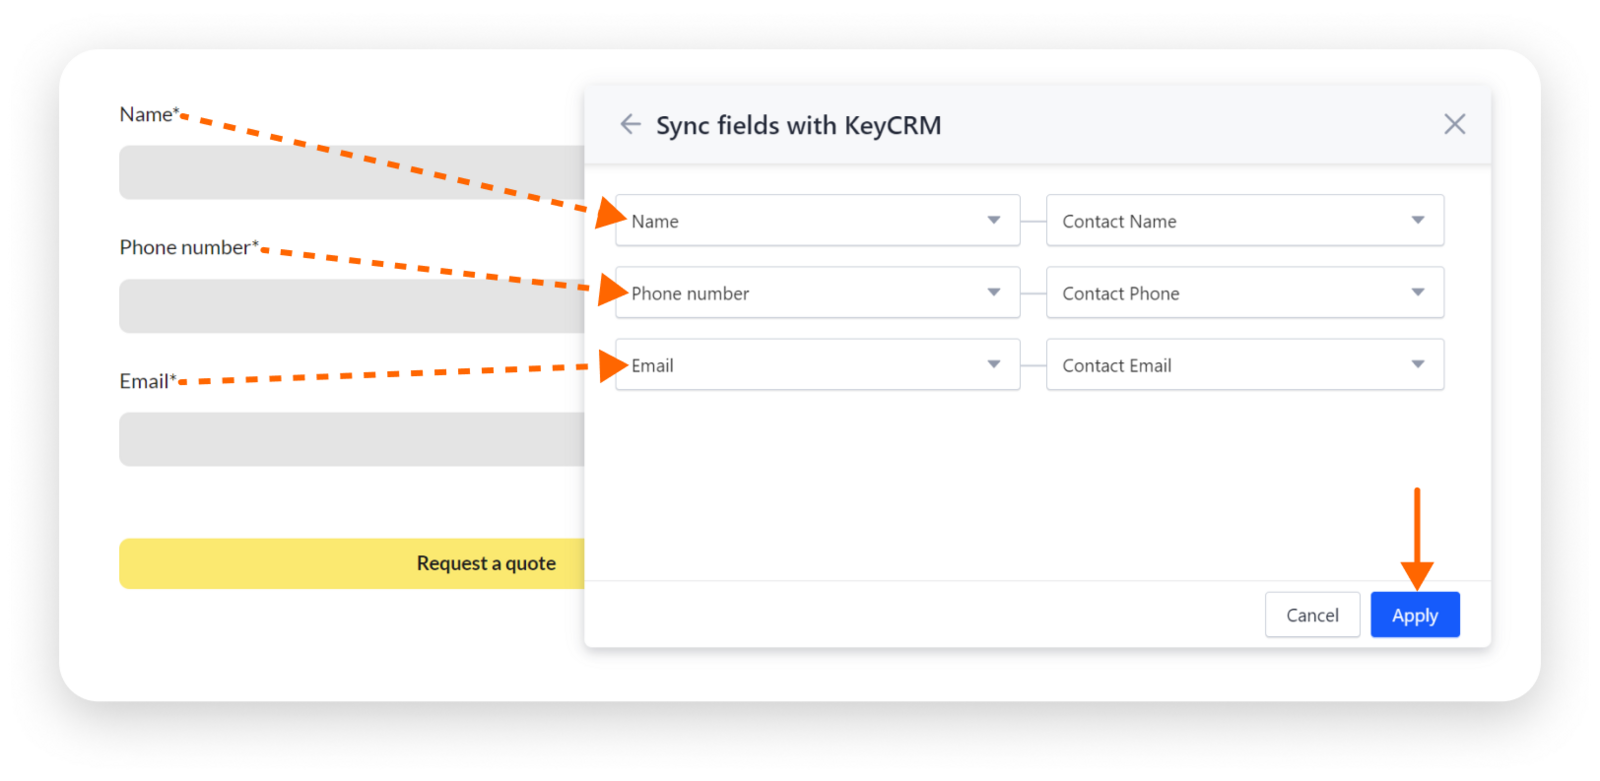
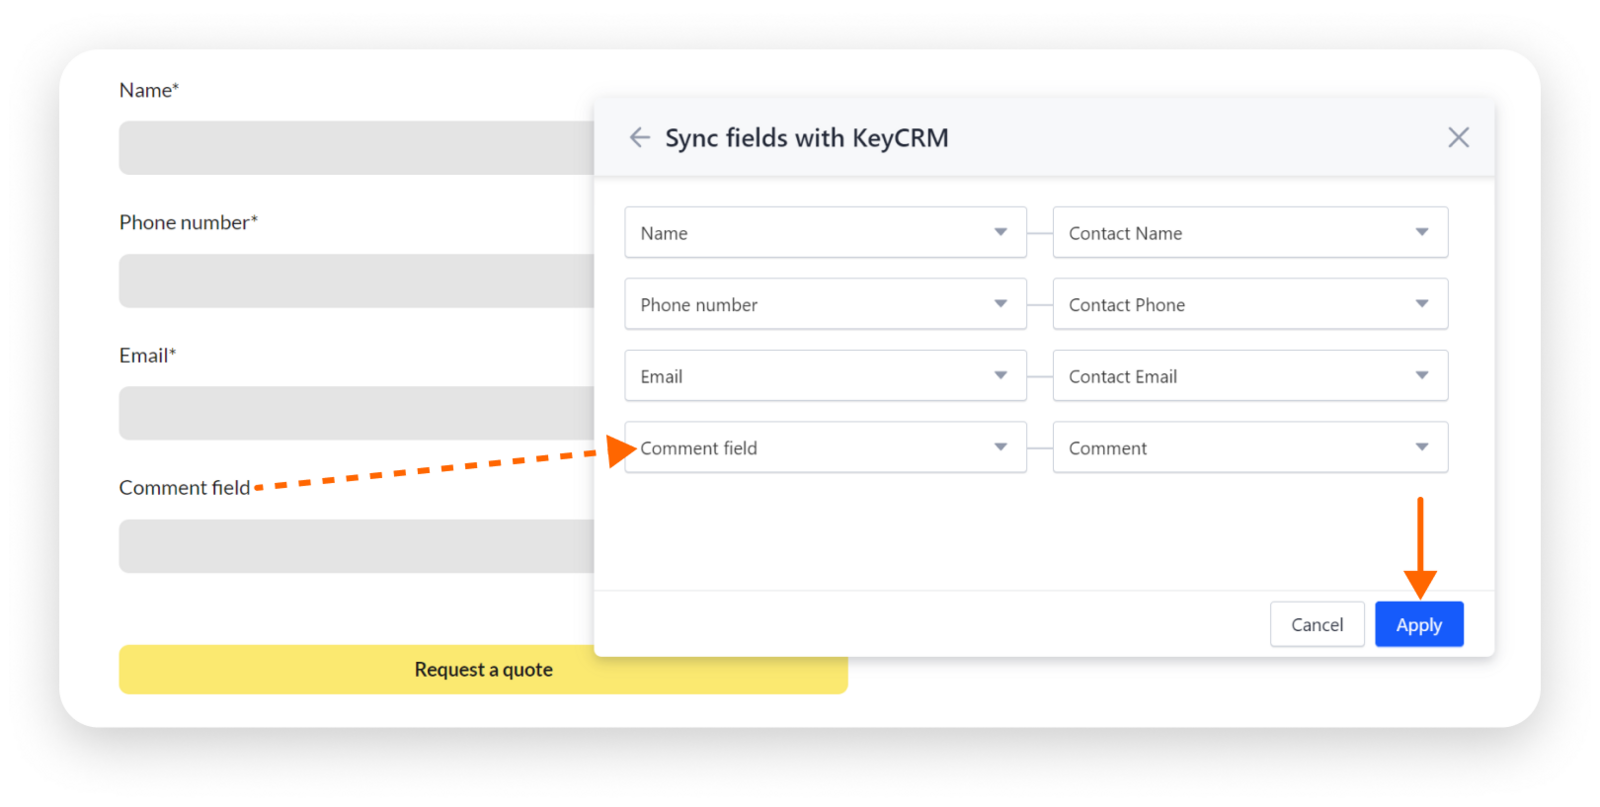
Select the field from your Weblium contact form in the drop-down list in the left column, and in the right column, select the field from keyCRM where the relevant information from the form will be sent.
If there are no such fields in the form, add them manually as hidden fields. After that, in the correspondence settings, you will be able to choose where exactly in the CRM to transfer the tag data.
Set up correspondence for all fields whose data needs to be transferred to keyCRM, and click on the «Apply» button:
Perform these steps for each form that needs to be submitted to keyCRM. Once you have completed the settings, publish your website for the changes to take effect.
Transfer of additional form fields
If you need to transfer more fields from the form to keyCRM than just name, phone number, and email, you need to create additional fields in keyCRM to receive the relevant information from the contact form fields.
For the «Date» field, you can create an additional field with the «Date» type or use a text field.
After creating all the necessary fields in keyCRM, they will appear for selection in the form field synchronization settings:
Once all settings are complete, all new forms submitted from your website will automatically appear in applications specified in the pipeline integration settings.