Adding custom fields to the order card expands the system's functionality for storing important information and monitoring employee performance.
You can tailor the order section to match your business needs, as well as store specific data for integration with external systems via API, etc.
How to Add a Custom Field
Go to Settings → Advanced → Custom Fields tab, click Add Field, and fill out the following:
- Title – this is what you’ll see in the order;
- Type – pick from the list:
Text – for short notes;
Select – choose from options;
Textarea – for more detailed info;
Link – for URLs;
Integer– integers only;
Float – supports fractions;
Date – set date;
Datetime – set date and exact time;
Toggle – a Yes/No switch (defaults to No). - Entity – select Order;
- Required – turn on if this field must be filled in at certain statuses. Then, check the statuses where this rule applies.
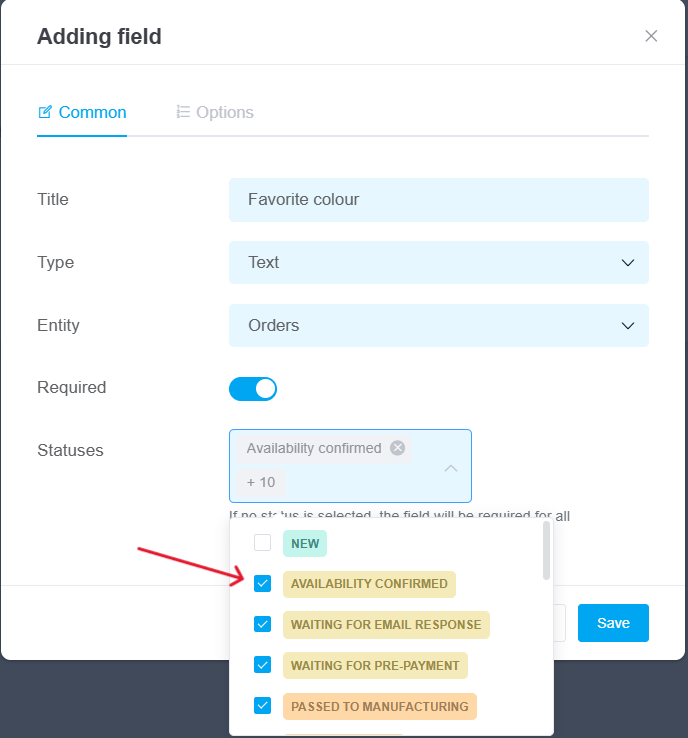
1. If no status is selected, the field will be required for all;
2. If the cancellation statuses are checked, then all other checkmarks are unchecked;
3. Fields of type Toggle can’t be made required.
Creating Select Fields
When choosing the Select type, you can also activate the Multiple toggle — this allows users to choose multiple options at once.
In the Options tab, add all the values that should be available for selection.
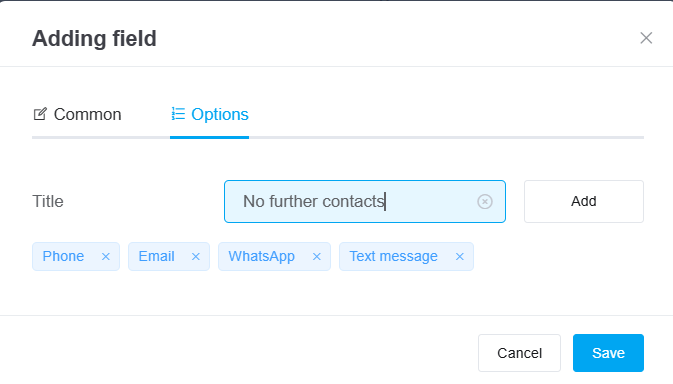
When everything is filled in, click Save. The field will then appear in the list and be available in the order card.
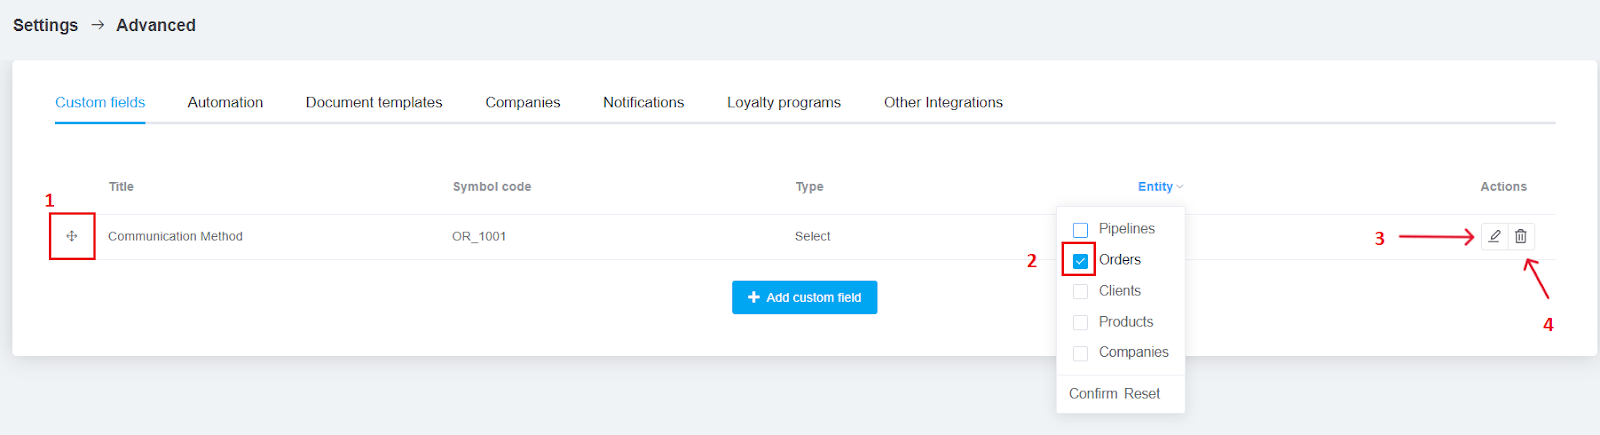
Managing Custom Fields
In the list of fields, you can:
-
Reorder fields – just drag and drop to change their position. This updates their order not only on this list but on the entity as well;
-
Filter by entity – quickly see fields related to orders or other entity;
-
Edit a field – click the pencil icon under Actions to change the field’s name, required status, or list options;
-
Delete a field – click the trash icon to remove it completely.
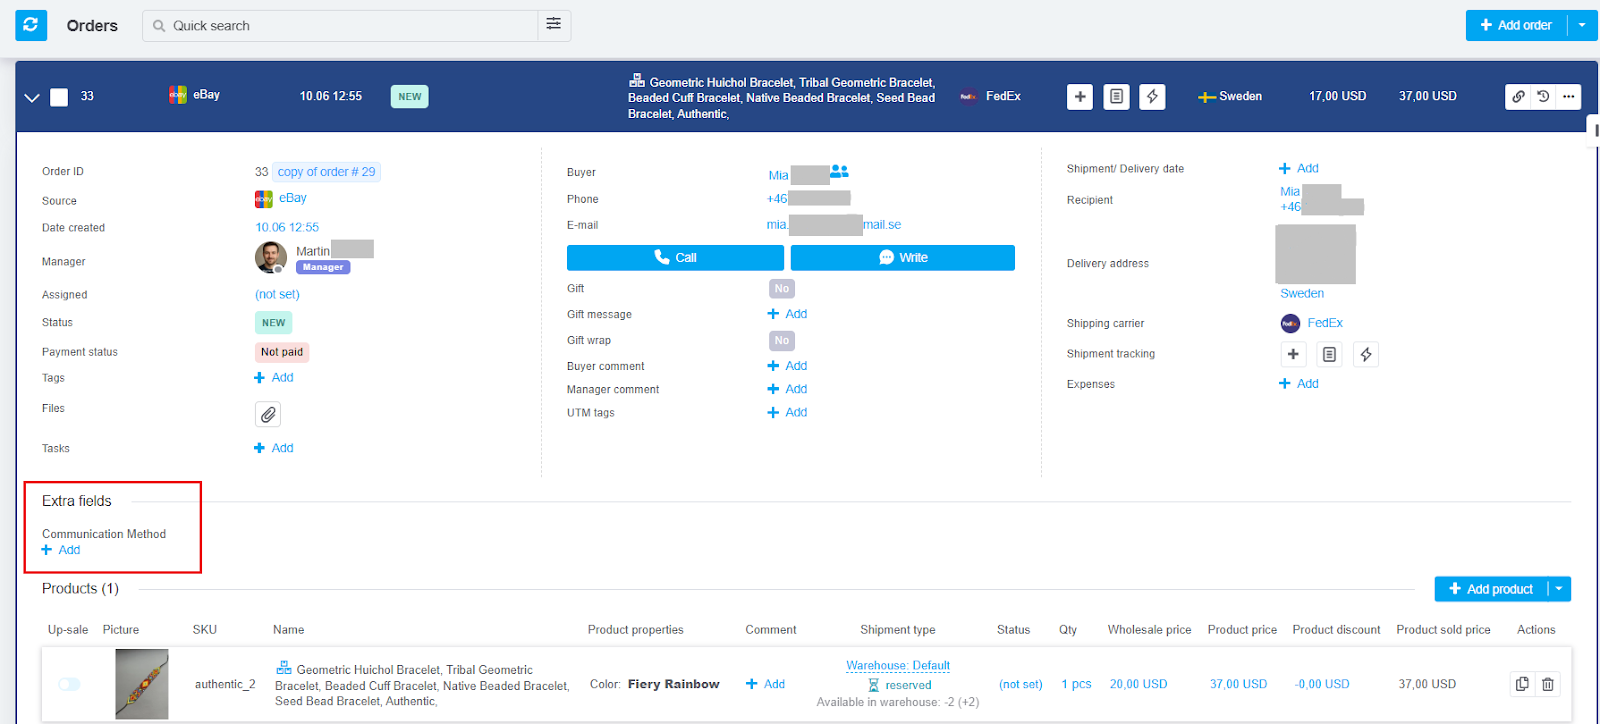
Where Custom Fields are Displayed
All custom fields are displayed in the Extra Fields section of each order.
You can fill it in when creating and editing orders, available in the order filter (except for fields with the Link type), document templates, and in our API.